Sharing folders over your network
One of the best things about having a wired or wireless network set up is that you can share folders between computers on your network. This lets you do things such as listen to music stored on another computer. This article shows you how.
Sharing folders is a little complex, so if you’re not comfortable with the steps below it might be worth hiring a tech to set up shared folders for you. That said, if you feel like learning more about your network, have a play and see what you can accomplish.
Folders that you may want to share over your home network include:
- Music files (or the My Music Folder)
- Video files
- Work files
To share a folder on the network
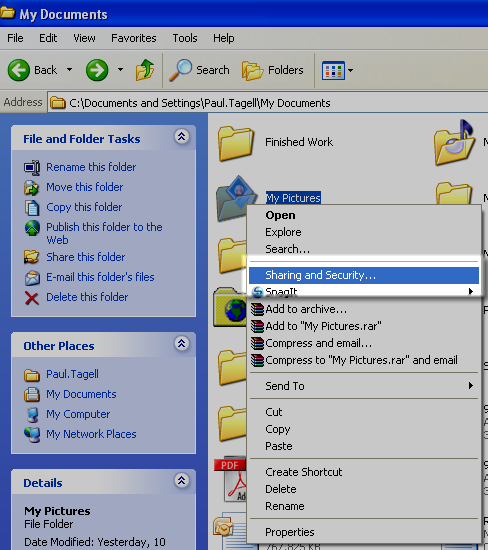
- Open Windows Explorer (by clicking Start, pointing to All Programs, Accessories, and then clicking Windows Explorer). Locate the folder you want to share. Remember that when you share a folder anyone on your network can access its contents.
- Right click the folder you want to share and click Sharing and Security
- Look for the Share this folder on the network check box and select it.
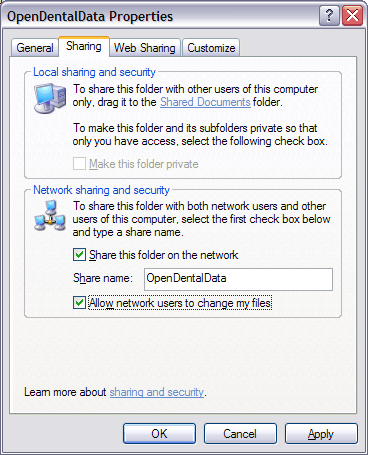
- To allow other users to have complete control over the files in this folder, select the Allow network users to change my files check box. If this is selected other users will be able to add, delete and modify your files.
- To change the name of your folder on the network, in the Share name text box, type a new name for your folder. This will not change the name of the folder on your computer.
- Click Ok. The folder is now shared on your network.
Accessing your shared folders
Now you have shared a folder you can access it from another computer on your network.
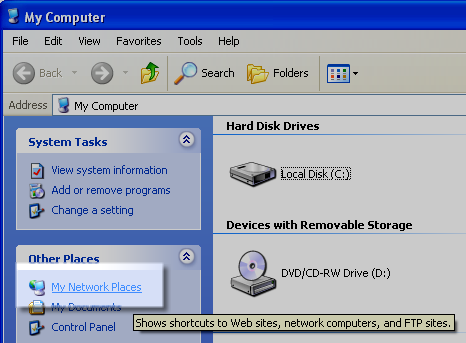
- Open My Computer (by clicking on Start then click My Computer).
- Under Other Places on the left-hand pane, click My Network Places.
- The name of your shared folder should be present under Local Network. If it is not, then you will need to find it manually. To do this, click on the Entire Network link under the Other Places pane on the left-hand side.
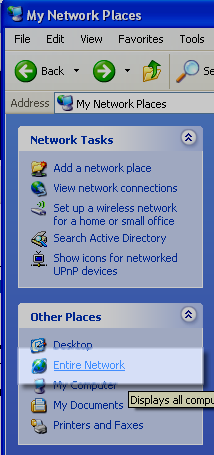
- Double Click on the icon to Microsoft Windows Network
- Double click on the icon that appears next. This is usually named MSHOME or WORKGROUP.
- An icon should exist for the computer which has the shared file on it, double-click it. Your shared directory should be in here. You can access files by opening the folder and can now use them as if they were on your local computer.
Remember, you will only be able to save changes to this location if you ticked the “allow network users to change my files” checkbox.
Written by The Orignal PC Doctor on 15/7/2010.