Keep your privacy on Facebook
The biggest fear for most people wanting to join is that their information will be visible to the world, this is a legitimate concern. Most people don’t want their social life on show for everyone to see.
This article is designed to show you how you can use Facebook’s privacy features to restrict the information of you on your Facebook account so you are back in control of your online identity.
There are a few ways in which you can achieve and manage your online life.
Accept or Deny?
One of the most important rules of social networking online is ensuring your online privacy is restricted to who you allow to be your friend. Facebook works primarily by allowing people to ‘find you’ through searching your details like your name, email, school, and request to be your friend. Once you accept them, with the default privacy settings enabled, they can view your photos, write on your wall and more. People can only become your friend on Facebook once you confirm their request, so this lets you control who views your information.
The best way to stop people from accessing that much information about you is to simply ignore their friend requests. They won’t be told that you ignored them. Keeping the information you wouldn’t normally share with them in the real world let alone online, safe.
Getting Started, Keeping Safe
Once you have signed up for a Facebook account by the websites default settings most of your information is shared with your friends. Details such as your birthday, email address as well as any other information you decide to submit to Facebook during the signup process. Keep in mind, if you don’t put the details that you don’t want people to know, they won’t have access to them.
Hiding from the search engines
The first thing you want to do to keep your information off the internet outside of the Facebook website, to disable the ability for people to find your Facebook profile using search engines like Google or Yahoo.
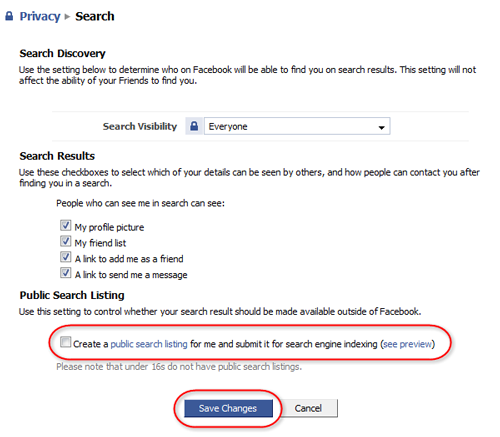
Turning off your Public Search Listing is easy. Sign into your Facebook account and then mouse over Settings in the top right corner and select Privacy Settings from the drop-down list.
Now, uncheck the checkbox for Public Search Listing. There are a few other options on this page which you may want to consider deactivating. Remember that people still need to be able to find you if they are to request to be your friend. Once you’re done remember to press Save Changes to apply the settings.
Control your private information
The next step to limiting who can see what on your Facebook profile, is to return to the Privacy Settings page and click the Profile link.
On the profile page, you will see lots of options which allow you to control who can see the different parts of your account. The information is broken down to give you a higher level of control. You can find out what information is included in each category by clicking on the small grey question mark on the right of each entry.
Most items give you three levels of privacy
- Friends of Friends
- Only Friends
- Customise
Friends of Friends and Only Friends are self-explanatory and are used by most people. Only Friends is probably a good setting for all of these options, however if you want more control, the Customise… option allows you to include or exclude specific people from your friend list. This is a great way, for an example to exclude work colleagues or to include just a few of your closest friends.
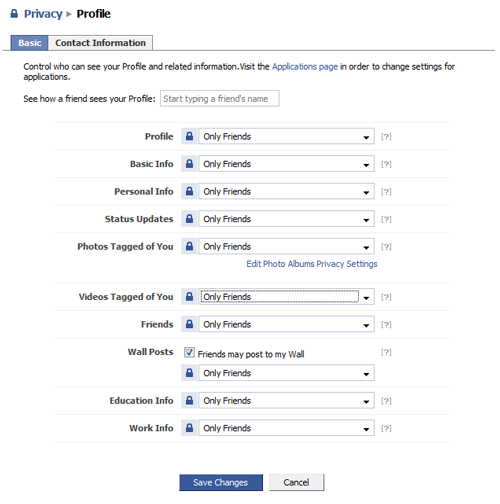
Photo albums
Each photo album you create lets you specify who is allowed to view it. Each time you create a new photo album you will be given the option shown below which allows you to specify whether your photos are fit for general viewing or specific friends only.
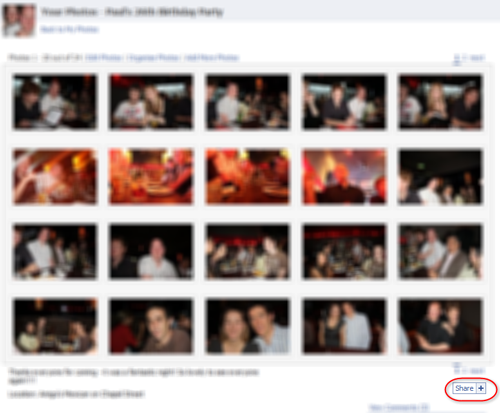
If you’re just getting started on Facebook chances are that lots of your friends might not be a part of it either, so if you want to share photos with them there Share feature built into each photo album. To use it, open your photo album; click the Share button in the bottom right corner and type in your friend’s email address. They will be sent a link which only allows them to access the album you have chosen.
Happy Networking!
Written by the Original PC Doctor on 22/10/2010.