Importing photos from your digital camera
The best thing about digital photography is that it makes taking lots of photos really simple. The slightly trickier thing is transferring them, here we give you instructions on how to import your photo’s using Vista.
![]()
- Connect your digital camera to your PC using the cables or dock which came with the camera (usually the USB cable). Most computers have an easily accessible USB port on the front of the case. If you have a USB Card reader then you can use that if you like.
- Make sure your camera has plenty of battery power, switch it to PC or “connect” mode (if applicable) and turn it on. If your camera does not have one of these modes, please read the manual for instructions on how to connect it to your computer.
- When you plug in your camera a selection window will appear. Click on Import Pictures from the available options.
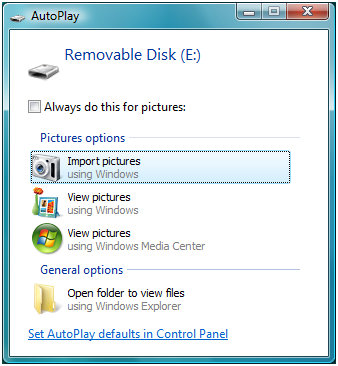
Note: By “importing” your pictures, your computer will take a copy of the photos on your camera and place them in a folder called “Pictures”. This folder is usually located under C:\Users\your_username\Pictures.In this example, it’s C:\Users\Gizmo\Pictures. - The next window will ask if you want to “tag” your images. Tagging lets you group your images around keywords of your choice. For example, if you were importing photos from a holiday in France, you might want to tag the images with the word “France”. This means that in the future, you can view all images with the Tag “France” without having to sort through them. You can have multiple tags attached to an image and can add, remove and edit tags after you have imported your images. This is one of the coolest new features of Vista! Click on Import. Your photos will start downloading to the Pictures folder in your user folder.
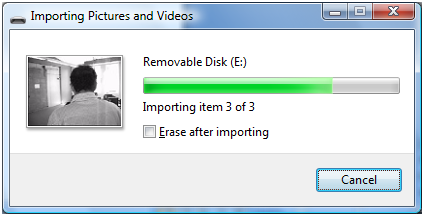
- If you would like to have the pictures erased from your camera after you have imported them, tick the Erase after importing option as your pictures are imported.
- Once your photos have finished downloading, you will be taken to your pictures folder and can sort, view, add tags and fix up your images.
Enjoy the photos!
Written by The Original PC Doctor on 2/12/2010