How to turn your PC into a DLNA media server on Windows 10
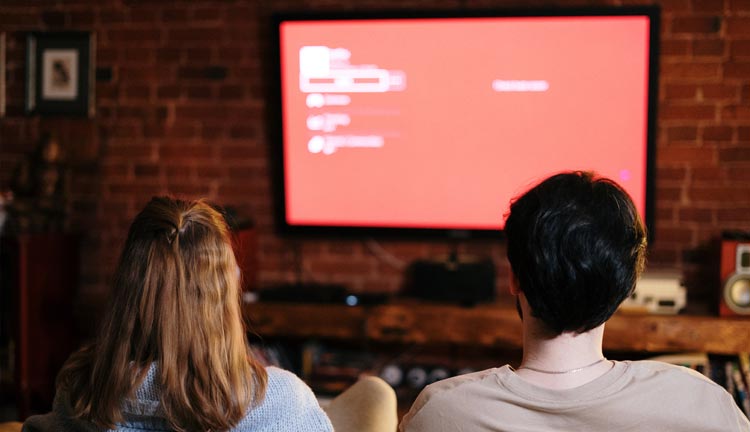
If you have a nice collection of movies on your PC, but you’d like to view them on your big TV. Windows 10 offers you an easy and quick way to do that over your home network.
It has an open standard for sharing media files over a home network called DLNA. In fact, most devices you connect to your TV, including Playstation 4, Roku, Chromecast, and even smart TVs come with DLNA to support the streaming of media over the network. But before you can begin, you must set up a DLNA server on PC.
So what’s DLNA?
DLNA (Digital Living Network Alliance) was set up by Sony in 2003. It comprises various organisations that come together and collaborated to design a standard for media streaming on a variety of devices.
DLNA refers to a set of guidelines or services that can run on a PC and allow access to stored media files (Videos, audio, photo) by other DLNA supported devices within the same network.
DLNA server uses Windows 10 media player-manager and delivers content through a customised protocol. This sends packets to DLNA devices such as TVs and speakers.
Devices that support DLNA use UPnP (Universal Plug and Play) to find each other automatically on the network, therefore you need not enter manual IP.
Even though DLNA is easy to use and setup, streaming in windows ten is largely dominated by third-party tools.
This is because of the several limitations DLNA has; It primarily targets those with a large local media library. As a result, you can’t stream your screen or browser video, only the media on your hard drive.
Also, DLNA fails to account for the rise of streaming services like ShowMax, Netflix, and Hulu.
Another downside to windows 10 DLNA is that it struggles with file formats. It only offers support to common files like MP3, WMA, and MP4.
But sometimes the MP4 files can fail if they’re bitrate or have a certain resolution. DLNA also cannot support extensions like AVI, MKV, and FLAC, despite their increasing popularity.
Now that you know its limitation let’s see how you can use it to stream your music and video files.
How to Enable Windows 10 DLNA Server
Microsoft has made it easier to access the DLNA-compliant feature from the Control Panel.
Here’s what you have to do to turn on media streaming:
- Open the Control Panel
Click the Start Button and type in “Control Panel.” Select the first result.
- Open Media Streaming Options
Once the windows ten control panel launches, head to the search bar and search for “Media Streaming.” Next, tap” Media Streaming Options” under “Network and Sharing Center.”
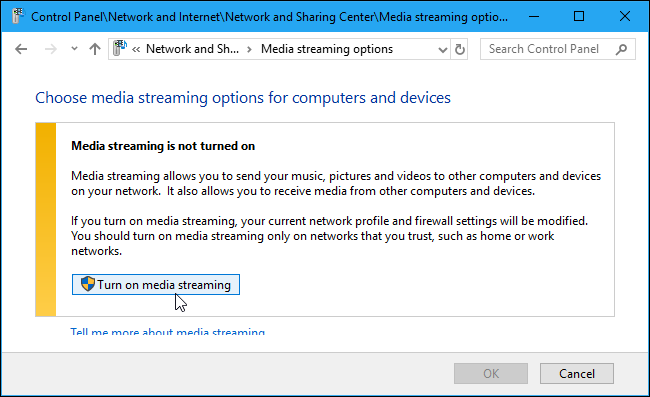
- Turn on Media Streaming
On the media streaming page, you’ll be provided with cautionary information, read it. If you’re sure you’re on a trusted network, then tap “Turn on media streaming.”
- Adjust your Media Streaming Options
On the next page, insert the name of your Windows 10 DLNA server so you can discover it on other devices. Click “OK” to make it available to your local network.
- Search for the Server on your Windows 10 DLNA Client
So you can stream your content, you need to find the DLNA server on another device. On your Windows 10, you can achieve this through the File Explorer. The network will provide you with a list of devices, including the one you named.
Head to your named device and double click it to access Windows Media Player, then you can easily play your files.
- Switch the media Collection
You’ll find your file in the Media Player in the “Other Libraries” section. Click your relevant section and view all your files.
- Manage your media through File Explorer
If you don’t enjoy using Window Media Player, head to “This PC“ and find “Network Location” in the File Explorer.
Double-click the media server to view the file list. Then select and play your media at your pleasure.
As you can see, once you enable media streaming, you have several options at your disposal, including the ability to name your library to make it easy to identify the files being accessed.
Remember to always keep your PC on when you’re streaming. If the PC is sleeping, then you won’t access your content on other devices.
To alter this inconvenience, adjust your power options by heading to “Choose power options” and configuring your PC to always stay awake.
When you’ve completed all the steps, then your media libraries will become accessible to any streaming devices, including Roku Media Player, Xbox Once Media Player, and PS4 Media Player.
Streaming DLNA Media from Another Device
Streaming your media content from other devices is easy and straightforward, but it all depends on the streaming you’re planning to use.
For instance, if you’re using Roku, first you need to install the Roku Media Player channel and launch it. Your DLNA server on your home network will get discovered in the list result, so you can choose your computer and stream your media files from it. Apart from browsing your shared media files from your PC, you can also utilise the Play to Feature to find your media files on your computer and automatically play them on the networked device. Or even use the DLNA media streaming option to send media from one PC to another.
Conclusion
It looks like DLNA is on its way out, that’s why it’s so hidden on Windows 10.
DLNA media streaming-only aims to play media files downloaded and stored on your PC and other devices. However, modern solutions are often focused on streaming media from the cloud.
Even if you want to have overall control over your local media library, solutions like Plex and Mirrorcast have more features and are much better.
Although this post has majorly focused on Windows 10, you can still enable media-streaming in windows 8.1 too.
References
- https://pureinfotech.com/turn-pc-dlna-media-server-windows-10/
- https://www.howtogeek.com/215400/how-to-turn-your-computer-into-a-dlna-media-server/
- https://winaero.com/blog/how-to-enable-dlna-server-in-windows-10/
- https://www.support.com/how-to/how-to-set-up-a-dlna-media-server-in-windows-12667
- https://winbuzzer.com/2020/05/15/how-to-use-your-pc-as-a-windows-10-dlna-server-for-media-streaming-xcxwbt/
Written by The Original PC Doctor on 17/7/2020.


