How To Clean Your Keyboard
Whether you are typing a document, filling out your accounting sheet, or playing a game, when you work with your computer, you will generally heavily depend on a keyboard. Even in cases where you do not regularly have snacks around when you work on the computer, dust and debris still collect on the buttons and between the openings that are present on the keyboard.

Dead skin cells, sweat, and even germs can also accumulate on your keyboard, which can make your desktop setup an unhygienic environment. In fact, some reports state that a keyboard can quickly become a breeding ground for bacteria. Fortunately, it isn’t that difficult to clean your keyboard, but you should follow a few steps and take certain factors into consideration. In this post, we will help you understand the steps you should take to properly clean your keyboard.
Considerations Before You Clean Your Keyboard
A keyboard is an electrical peripheral that plugs into your computer. This means there are electronic components inside the keyboard that allows it to send signals to your computer every time you press on one of the keys. This is why you need to consider the way that you are going to clean the keyboard carefully.
It is a good idea to look at the technical specifications of your keyboard. Some keyboards do feature a waterproof or spill-resistant design. These types of keyboards are usually easier to clean with damp items, such as a wet wipe. Additionally, consider the type of keys that your keyboard uses. Certain keys are easy to remove and take little effort to put back into their position. With this type of keyboard, you can usually remove the keys to provide a more thorough cleaning. Do not, however, attempt to remove the keys on keyboards that do not come with this type of easy-to-remove key design.
Another important consideration is whether it is a loose keyboard or one that is integrated into your laptop. When you clean a laptop keyboard, you need to be extra careful. Liquids that accidentally drop onto the keyboard could leak into the interior of the laptop and cause serious damage. Always power off your laptop and remove the battery when you want to clean the keyboard. For a desktop keyboard, you should also unplug the keyboard or remove any batteries before you attempt to clean it.
Other than these factors, the frequency and ideal cleaning process also depends on whether you use the keyboard at home or in the office.
Cleaning Your Keyboard
When it comes to cleaning your keyboard, you should first ensure you gather everything you will need during the process. This is why we are going to start out with a list of tools and items you need to properly clean your keyboard.
Here is a list of items that you should gather before you start to clean your keyboard:
- A can of compressed air
- A handheld dust vacuum with a small brush attachment
- Cotton swabs
- Paper towel
- Lint-free cloth
- A bottle of isopropyl alcohol
Once you gather all of these ingredients, you can begin the process. First, make sure to unplug your keyboard from your computer. If you have a wireless computer, remove the batteries. In the case of a laptop, do not only turn the laptop off, but also remove its battery. This is a safety precaution that can help to prevent malfunctions and damage to electronic components.
The first step is to turn the keyboard over with the keys facing down. Shake the keyboard, as this can help to loosen some of the debris that has been collected in the keyboard. Make sure you are gentle when you shake the keyboard, as you do not want to cause damage to it.
Turn your keyboard back upside. Now, you should get a can of compressed air. Make sure you use the straw that goes into the sprayer. Push the stick between the keys on your keyboard as you spray. This helps to loosen the debris that did not come loose while you shook the keyboard upside down. Blow at the keys from different angles. You can also elevate the back side of the keyboard slightly so that it sits at an angle when you spray it with compressed air.
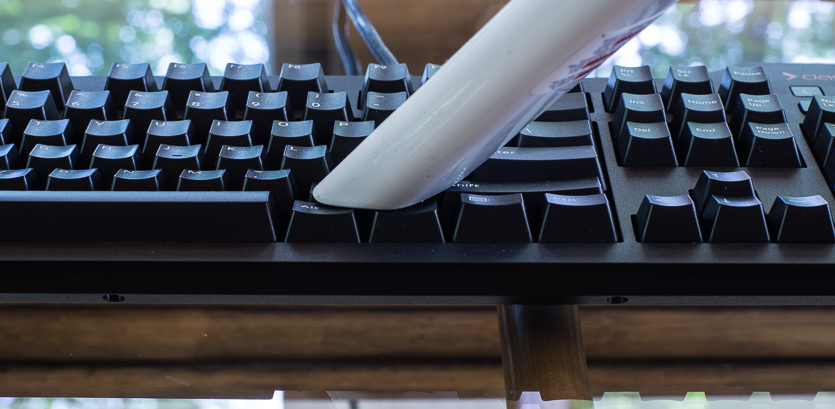
Next, use the vacuum cleaner on your keyboard. You should use an attachment with a brush and move it gently over the keys on the keyboard. The vacuum will help to pick up more of the debris that is harder to remove.
Follow up with the isopropyl alcohol. First, dip a cotton swab into the alcohol and use it to wipe the sides of all the buttons. This can help to remove oils and grime that sit on the keys, as the previous methods might not have removed everything. After using the cotton swab, dip some paper towels into the isopropyl alcohol and then scrub the top region of your keyboard with it. Be gentle but still firm enough to ensure you remove any leftover debris. If you do not have a paper towel, then you can also use a lint-free cloth to scrub the upper side of the keyboard.
The final step is to simply polish the keyboard with a lint free cloth. If you used a lint-free cloth with the alcohol in the previous step, then get a new one. The cloth should be completely dry. Wipe the surface of the keyboard with the cloth. This will help to remove any moisture that was left by the alcohol you used to scrub the surface of the keyboard.
While the alcohol should evaporate in a short period of time, it is still a good idea to let the keyboard stand for a short while before you plug it back into your computer.
How Frequently Should You Clean Your Keyboard?
It is important to know how frequently you should clean and sanitise a keyboard. There are a couple of elements that affect this question. First, consider how frequently you use the keyboard. If you use the keyboard every day and for extended periods of time, then it is important to clean it more frequently. You should also consider whether you regularly eat at your desk when you use the keyboard. Small crumbs of food can fall into the openings in the keyboard and lead to the growth of bacteria. In this case, more frequent cleaning is also essential.
It is a good idea to give your keyboard a thorough clean about once a week. If you do not use it too frequently, then you can do this about once or twice a month instead. If you practice hygienic habits while you work on your computers, such as keeping hand sanitiser close and using it after touching food and other items, then you may also find that you only need to clean the keyboard about once every two weeks.
Conclusion
A keyboard is essential, but it can also harbor bacteria and other germs, as well as dust and even allergens. Regularly cleaning your keyboard can help to reduce the accumulation of these particles and also ensure you effectively extend its lifespan. When it comes to cleaning a keyboard, make sure you follow the steps we provided in this post. They will ensure you can clean your keyboard without causing damage to its interior components.
References
- https://www.edwardbaden.co.uk/news-tips/is-your-computer-a-breeding-ground-for-germs
- https://livingscented.com/how-long-does-it-take-for-isopropyl-alcohol-to-evaporate/
Written by The Original PC Doctor on 3/1/2023.