Water-Cooled PC Systems: Troubleshooting Basics & Knowing When to Call in a Pro
Water cooling offers powerful thermal performance and a quiet computing experience—perfect for gamers, overclockers, and professionals running high-performance rigs. But unlike air-cooled systems, water cooling adds complexity and potential failure points.
Whether you’re hearing unusual noises, noticing high temps, or spotting signs of a leak, this guide will help you troubleshoot the basics of your water-cooled setup. We’ll also point out the red flags that signal it’s time to call in a professional PC repair technician.
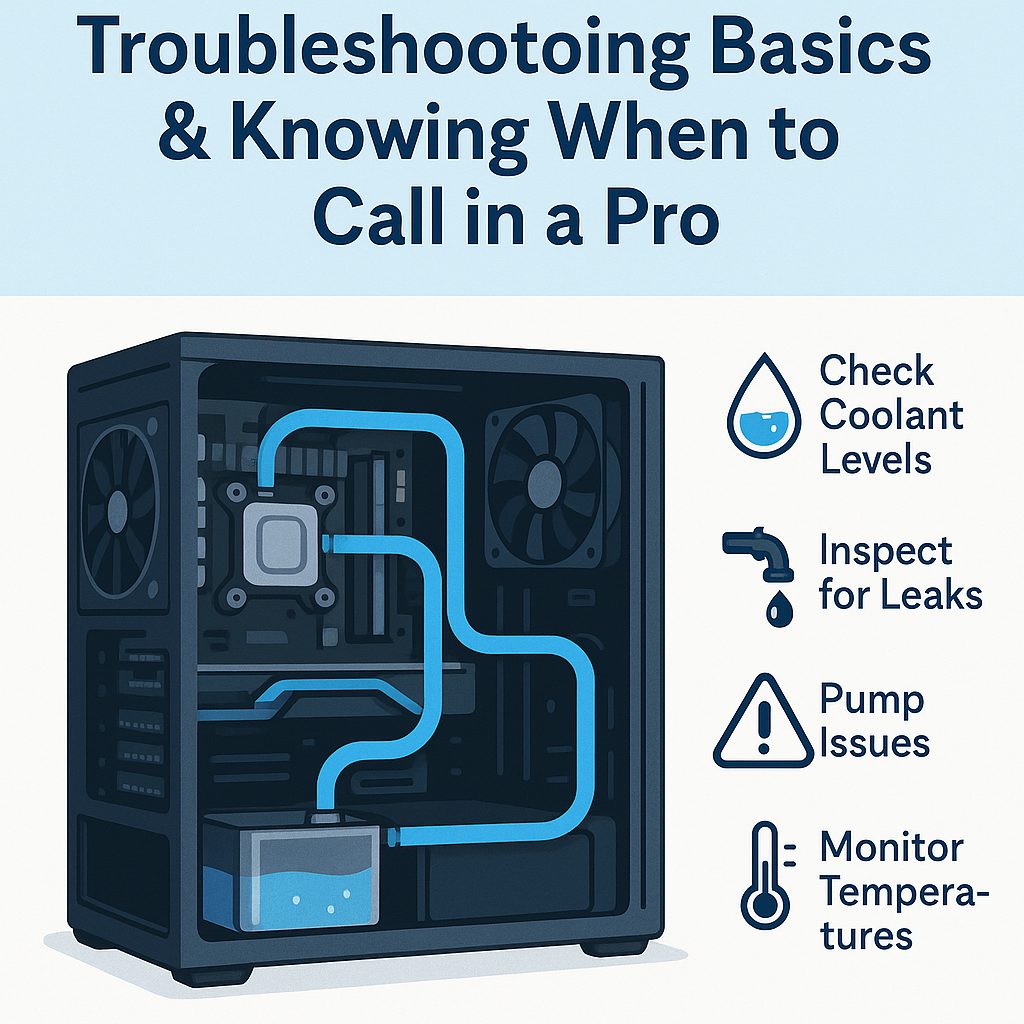
1. Check Your Coolant Levels Thoroughly
Why It Matters:
Low coolant is one of the most common causes of poor cooling performance and noisy pump operation. Over time, evaporation or micro-leaks can reduce the volume of liquid in your loop—even in closed-loop systems.
What to Look For:
Open the reservoir or check the fill port (if your system is sealed) to visually inspect the coolant level. If it’s lower than expected, it can cause the pump to suck in air, leading to gurgling sounds and inefficient heat transfer.
How to Top It Up:
Use only the coolant recommended by your cooler’s manufacturer—ideally pre-mixed solutions or distilled water with anti-corrosive additives. Never use tap water, as it can cause mineral deposits and bacterial growth over time.
Pro Tip:
Mark the coolant level periodically to track slow leaks or evaporation.
2. Inspect the Entire Loop for Leaks
Why It Matters:
Even the smallest leak in a water-cooled system can spell disaster for your PC hardware. Leaks can form around fittings, tubing ends, radiator connections, or even the pump seal.
How to Check:
Turn off your PC, then inspect all visible fittings and tubing. Look for moisture, discoloration, or residue near joints. Place paper towels or tissues under fittings and run the pump for a few minutes to detect slow leaks.
What You Can Do:
Tighten fittings gently (do not overtighten), replace cracked tubing, and always keep spare O-rings and clamps on hand.
Advanced Tip:
Use a UV-reactive coolant and a blacklight to spot invisible leaks.
3. Diagnose Pump and Flow Issues
Why It Matters:
Your pump is the heart of your water-cooling system. If it’s not working properly, coolant won’t circulate—leading to rising component temperatures and potential hardware failure.
Symptoms to Watch For:
-
Gurgling, grinding, or clicking sounds
-
No coolant visibly moving through flow indicators
-
High temperatures despite adequate coolant levels
DIY Fixes:
First, make sure the pump is powered and receiving sufficient voltage. Air bubbles trapped in the pump can cause it to cavitate (spin uselessly). Gently tilting the case while the system is on can help purge trapped air. You can also run the pump at full speed briefly to encourage bubble movement.
If That Doesn’t Work:
You may be facing a failing pump or a blocked channel—something best diagnosed with professional tools and experience.
4. Check for Flow Blockages or Restriction
Why It Matters:
Even if the pump is running, blockages from debris, algae growth, or poorly routed tubing can reduce flow and hinder cooling performance.
Common Causes of Blockages:
-
Algae/sludge buildup in neglected loops
-
Debris from corroded fittings or reservoir caps
-
Kinked or pinched tubing, especially in tight cases
How to Fix It:
Drain your loop and flush it with distilled water. For severe buildup, use a purpose-made radiator cleaner or loop cleaning kit. If you notice consistent flow issues in a certain section, consider re-routing your tubing or upgrading to larger diameter hoses.
Preventive Measure:
Use a filter in the loop if your system allows, and always clean components thoroughly before assembly.
5. Monitor CPU/GPU Temperatures Closely
Why It Matters:
High temperatures can lead to CPU throttling, decreased performance, or even thermal shutdowns. Water cooling should provide lower temps than air cooling—if it doesn’t, something’s wrong.
Tools to Use:
Download monitoring tools like:
Check idle and load temperatures. For water-cooled systems, idle CPU temps should generally be under 40°C, with load temps not exceeding 70–75°C on most modern CPUs (unless overclocked).
When to Worry:
If you’re seeing CPU or GPU temps creeping over 80–90°C, there’s likely a cooling failure. First check coolant levels, flow, and pump function. If everything looks fine and temps are still high, call in a tech.
6. Properly Bleed the Loop of Air Bubbles
Why It Matters:
Trapped air in the system can cause noise, reduce pump efficiency, and lead to hotspots around the CPU/GPU blocks. This is a common issue with freshly built or recently drained loops.
Symptoms:
-
Bubbling or rattling sounds
-
Flow meter not spinning
-
Coolant levels dropping quickly after startup
How to Bleed the Loop:
Tilt and rotate the case gently while running the pump (without other components powered on if possible). Make sure your reservoir is the highest point to help air rise naturally. You may need to run the pump continuously for several hours before all bubbles are eliminated.
Extra Tip:
Use an inline flow meter or see-through tubing to visually confirm when bubbles are gone.
🧯 Warning Signs That Require Professional Help
Some issues with water-cooled systems go beyond DIY. Here’s when you should stop and contact a technician:
❌ 1. Visible Corrosion or Rust
-
This indicates chemical imbalance or poor loop hygiene.
-
Fixing it may require a full teardown and replacement of components.
❌ 2. Water Damage to Components
-
A leak that reaches your GPU, motherboard, or PSU can be catastrophic.
-
Don’t attempt to power on the system—unplug and seek professional help immediately.
❌ 3. Pump Failure or Controller Board Issues
-
If your pump stops working or the fan/pump controller isn’t responsive, you may need replacement parts and firmware configuration help.
❌ 4. System Won’t Boot After Water Loop Maintenance
-
Common causes include wet connectors, shorts, or damaged components.
-
A pro can isolate the issue and perform diagnostics to avoid further risk.
❌ 5. Loop Design or Installation Errors
-
If you’ve built the loop yourself and it’s performing poorly, it may be due to bad flow order, radiator placement, or incorrect fitting sizes.
-
Professionals can redesign and rebuild your loop for optimal performance and safety.
💡 Bonus Tips for Maintaining a Water-Cooled PC
-
Flush the loop every 6–12 months.
-
Use biocides or silver coils to prevent algae and microbial growth.
-
Keep dust off radiators for better heat dissipation.
-
Always leak test a new build with just the pump powered—no other components connected.
🔧 Not Sure What’s Wrong? Call The Original PC Doctor
Water-cooled systems are powerful—but when they go wrong, they can be a costly nightmare. If your system is running hot, noisy, or worse—leaking—it’s better to be safe than sorry.
At The Original PC Doctor, our expert technicians can:
-
Diagnose complex liquid cooling issues
-
Replace failed pumps and components
-
Rebuild or redesign your loop from scratch
-
Rescue and recover systems damaged by coolant leaks
📞 Call us now on 1300 723 628 or book a technician visit to your home or office. We service all major cities across Australia.
Download our Free Water Cooling Checklist Below.
The_PC_Doctor_Watercooling_Checklist_Enhanced
Final Thoughts
Water cooling your PC is a high-performance choice that requires some hands-on care. Knowing how to troubleshoot the basics—plus recognising when to call for backup—can save your gear from costly damage and keep your system running cool and quiet for years.
Content Created on 28/05/2025 by
John Pititto
Managing Director
The Original PC Doctor


